
Our new (54 year old) home has many walls covered in some sort of plaster. Some of it is smooth, and some of it has a mild rough texture. It feels like a painted cement block, but there are no blocks present.
We have a good sized blank foyer wall that needed a little something to dress it up. Since we are in the middle of this retired/work part time season of life, we have more time to focus on our home.
There are many blog posts and home improvement websites with step by step instructions on how to add board and batten to a wall. I follow a home improvement blogger, Thrifty Decor Chick, and like her tutorial here.
We knew board and batten would look good on this wall and combined research from various tutorials...meaning we decided to wing it!
 |
| Blank foyer wall inside front door. |
Here's how it usually goes. I have an idea. I tell Bill my idea. He tells me to write it down, text it or send him the photo of what I'm thinking. We talk about it. We measure. We pick up the supplies. He measures again, cuts everything, makes sure all is level, and builds it. I patch the holes and imperfections, sand, caulk, paint and decorate.
Supplies needed:
-1"x 2" piece of pine cut to size for cap at top
-1/4" plywood cut into 3" strips and sanded on one side for horizontal piece under 1x2 at top, vertical boards and horizontal box boards. (we had this left over from a baseboard molding project.)
-Primer of your choice (already had)
-Trim Paint of your choice in the finish: satin, semi-gloss, gloss to match the other trim in your home.
-Wood putty of your choice
-Caulk of your choice (already had)
-nail gun, finish and brad nails, sandpaper, level, sliding miter saw. ***You could easily use a manual miter box and hand saw, hammer and small nails to attach. Be sure to counter sink your nails with a counter sink tool that is used with a hammer to push the nail heads below the surface of the wood. See how to do this here.***
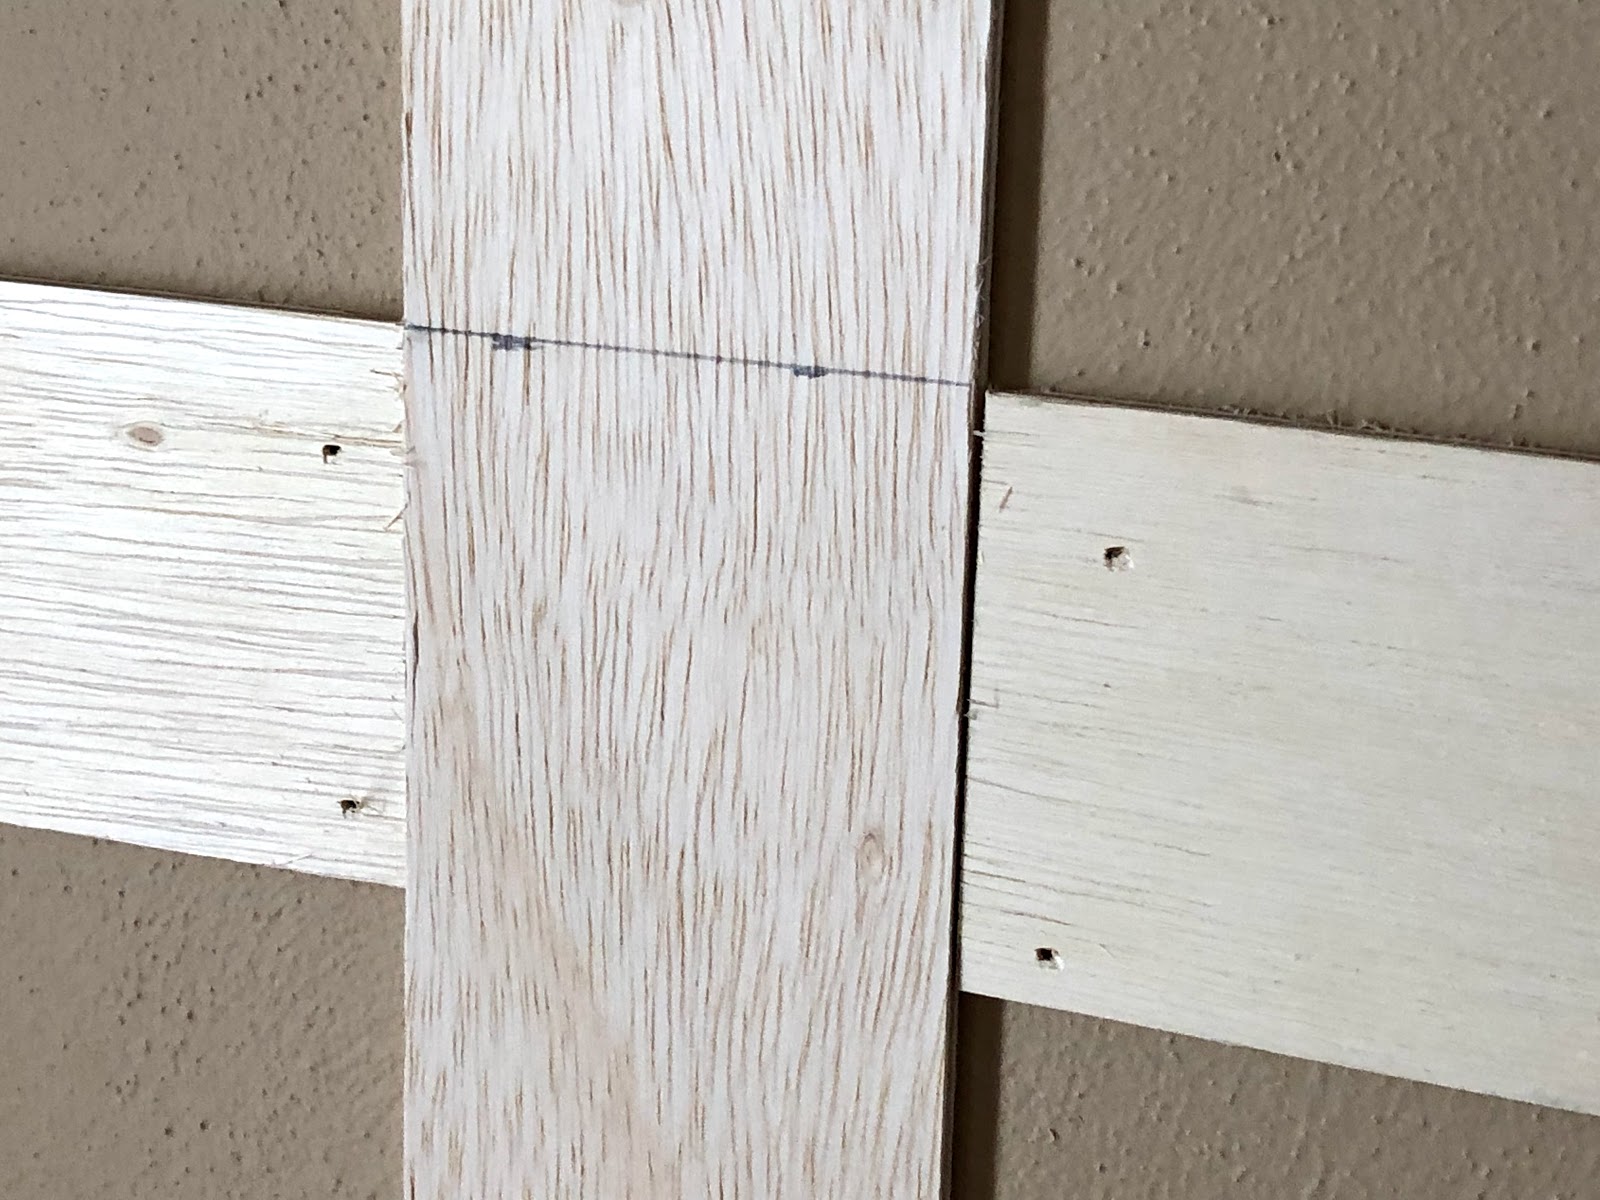
The photo below shows how we determined how many sections to add. You can find your wall stud placement with an electronic stud finder, or watch this video here. Bill measured out the distance for 4 and then for 5 total vertical sections. He then held up the vertical piece of 3" plywood for me to see which looked best. He usually tells me which he prefers and I just agree. 😇

You now have the 1x2 pine board, a 3" horizontal section of 1/4" plywood underneath that, then your vertical 3" plywood strips. You could leave it at that, or add horizontal boxes to the mix. We decided to put one row of horizontal boxes across (because I think that looks nice😊). This horizontal row is placed 12" from the bottom of the upper 3" board. Again, you can space the boxes however you like.
Now...use wood putty to fill the nail holes and where the individual sections of wood are joined together. When dry, sand smooth. You may have to do this a few times, especially if your joins are not the same height.
Details: Did I say this is an old house? Many things are not straight...the windows, walls, floors...and electric faceplates. We didn't want to get into having to elevate the plate because it is covered only 50% by the vertical strip. Instead, we chose to fill the area, still allowing the plate to be easily removed. It is not a big deal because it is going to be behind the console anyway.
Not perfect - but it works! One of the best parts - since we already had some of the needed supplies on hand, we determined that the out of pocket costs for the supplies we purchased at the start of the project were $9.00. That's right - NINE DOLLARS! It took Bill about 2 hours for the build. It took me 3 days to finish. It would have taken me 2 days, but I came down with some kind of sinus thing and had to add another day.
Enjoy more before and afters and comment with any questions, or post photos of your own projects below.
If you are staring at a blank wall, don't be afraid to try something like this. Draw a rough outline, measure the area, research using Pinterest, Thrifty Decor Chic or another blog, Google it and then WING IT!
Enjoy your day!
Kelli
***You may and are encouraged to directly link to this posting, however, all print content and images used here are owned by Kelli In the Middle and may not be used in whole or part in other media without written permission from Kelli Siehl***
-1/4" plywood cut into 3" strips and sanded on one side for horizontal piece under 1x2 at top, vertical boards and horizontal box boards. (we had this left over from a baseboard molding project.)
-Primer of your choice (already had)
-Trim Paint of your choice in the finish: satin, semi-gloss, gloss to match the other trim in your home.
-Wood putty of your choice
-Caulk of your choice (already had)
-nail gun, finish and brad nails, sandpaper, level, sliding miter saw. ***You could easily use a manual miter box and hand saw, hammer and small nails to attach. Be sure to counter sink your nails with a counter sink tool that is used with a hammer to push the nail heads below the surface of the wood. See how to do this here.***
 |
| He measures and makes sure everything is level. |

We decided 5 vertical sections would look best. (5 sections = 6 vertical 3" strips of wood). There is 17" between each section with 16 1/2" between the far right. (Nobody is perfect and you can't even tell!) Also, note that the 1x2 strip of pine placed horizontal at the very top has the 2" section flat against the wall as in photo below. We did this because we have a mirror we plan to hang and the top third of the mirror will be above this strip. We did not want the board to be projecting out 2". We can still prop pictures on the 1" top ledge if needed. Many tutorials say to place that top piece with the 1" section flat against the wall, so the 2" section protrudes, showing more of a cap and allowing you to prop larger objects there. It's all a matter of individual taste and necessity.
 |
| 5 sections, 6 vertical boards |
 |
| 2" section is laying flat against wall. |
 |
| horizontal boxes all done! |
 |
| Caulk then prime. |
 |
| Use wood putty then sand where pieces join together. |
Caulk all of the areas where the wood meets the wall to avoid gaps. Take care by taping before applying primer and paint. This project needed 2 coats of water based primer and 3 coats of white, satin trim paint.
NOTE: If you have never painted your walls and you aren't sure if the prior paint is water or oil-based...don't guess. Just use an oil-based primer but be sure to protect your floors and walls, etc., from drips because an oil-based product will not wash off.
Details: Did I say this is an old house? Many things are not straight...the windows, walls, floors...and electric faceplates. We didn't want to get into having to elevate the plate because it is covered only 50% by the vertical strip. Instead, we chose to fill the area, still allowing the plate to be easily removed. It is not a big deal because it is going to be behind the console anyway.
 |
| before |
 |
| after |
Enjoy more before and afters and comment with any questions, or post photos of your own projects below.
 |
| before |
 |
| after |
If you are staring at a blank wall, don't be afraid to try something like this. Draw a rough outline, measure the area, research using Pinterest, Thrifty Decor Chic or another blog, Google it and then WING IT!
Enjoy your day!
Kelli
***You may and are encouraged to directly link to this posting, however, all print content and images used here are owned by Kelli In the Middle and may not be used in whole or part in other media without written permission from Kelli Siehl***
8 comments:
Did the nail gun work on plaster walls if so what gauge nail did you use?
You said you had plaster type walls did the nail gun work to hold everything to the walls?
Yes, the nails held everything into place. Be sure to get the correct nail length to secure into the studs. Use the minimal amount of nails needed. It is holding up well! Sorry it took so long to post a reply, just came through.
Hi! I have 1920s plaster walls and really want to try this. Which specific nail gun did you use?
The specific nail gun is a Bostich 16 guage finish nailer.The project has held up perfectly! No cracking or separation.
Thank you so much for the post and helpful reply!! It looks beautiful and I think I will try!
Post a Comment