Refurbing a pretty little sewing chest I found at a local second hand store was one of them. Here's the before:


The drawers were filled with sewing goodies! It was really fun going through this stuff to see what treasures were collected by the past owner. There were more than 50 spools of sewing thread as well as buttons, snaps, crochet hooks (yea!) and even a seam ripper.
The finish was in rough shape, but I followed the advice of All Things Thrifty, http://www.allthingsthrifty.com, which offers a spray painting and glazing 101 tutorial, to give it a a brand new look.
I'm posting photos AND captions for those visual learners (like me!)
Supplies included Rust-Oleum Painter's Touch satin claret wine spray paint (the only barn red color available at our local hardware store), 220grit sandpaper, cotton swabs or small brush for glue, a couple of foam brushes, drop cloth to protect surfaces from paint, clean cotton cloth to wipe away dirt/dust, Sherwin William's faux Impressions clear glaze, Sherwin William's latex paint, satin finish in Otter. (I have to disclose that my husband works for SW Paint Company - you can use any brand of dark brown paint/glaze.)

I removed the drawers and lightly sanded all pieces with 220grit sandpaper and then wiped down with a clean, cotton cloth. I also glued a few loose knobs back in and let them dry for about 4 hours. I then put a drop cloth in the driveway and laid out each piece. I turned the chest upside down to get the underside, legs and body first (leaving the top for last). I did not prime the piece first because I was painting it a very dark color and wanted some of the natural finish and wood hues to come through. I sprayed on four thin coats of spray paint (be sure to shake the spray paint can for at least 2 minutes and during application) - applying several thin coats helps deter the paint from running.


I placed parchment paper under the hinged openings on either side of the top so the paint would not stick.
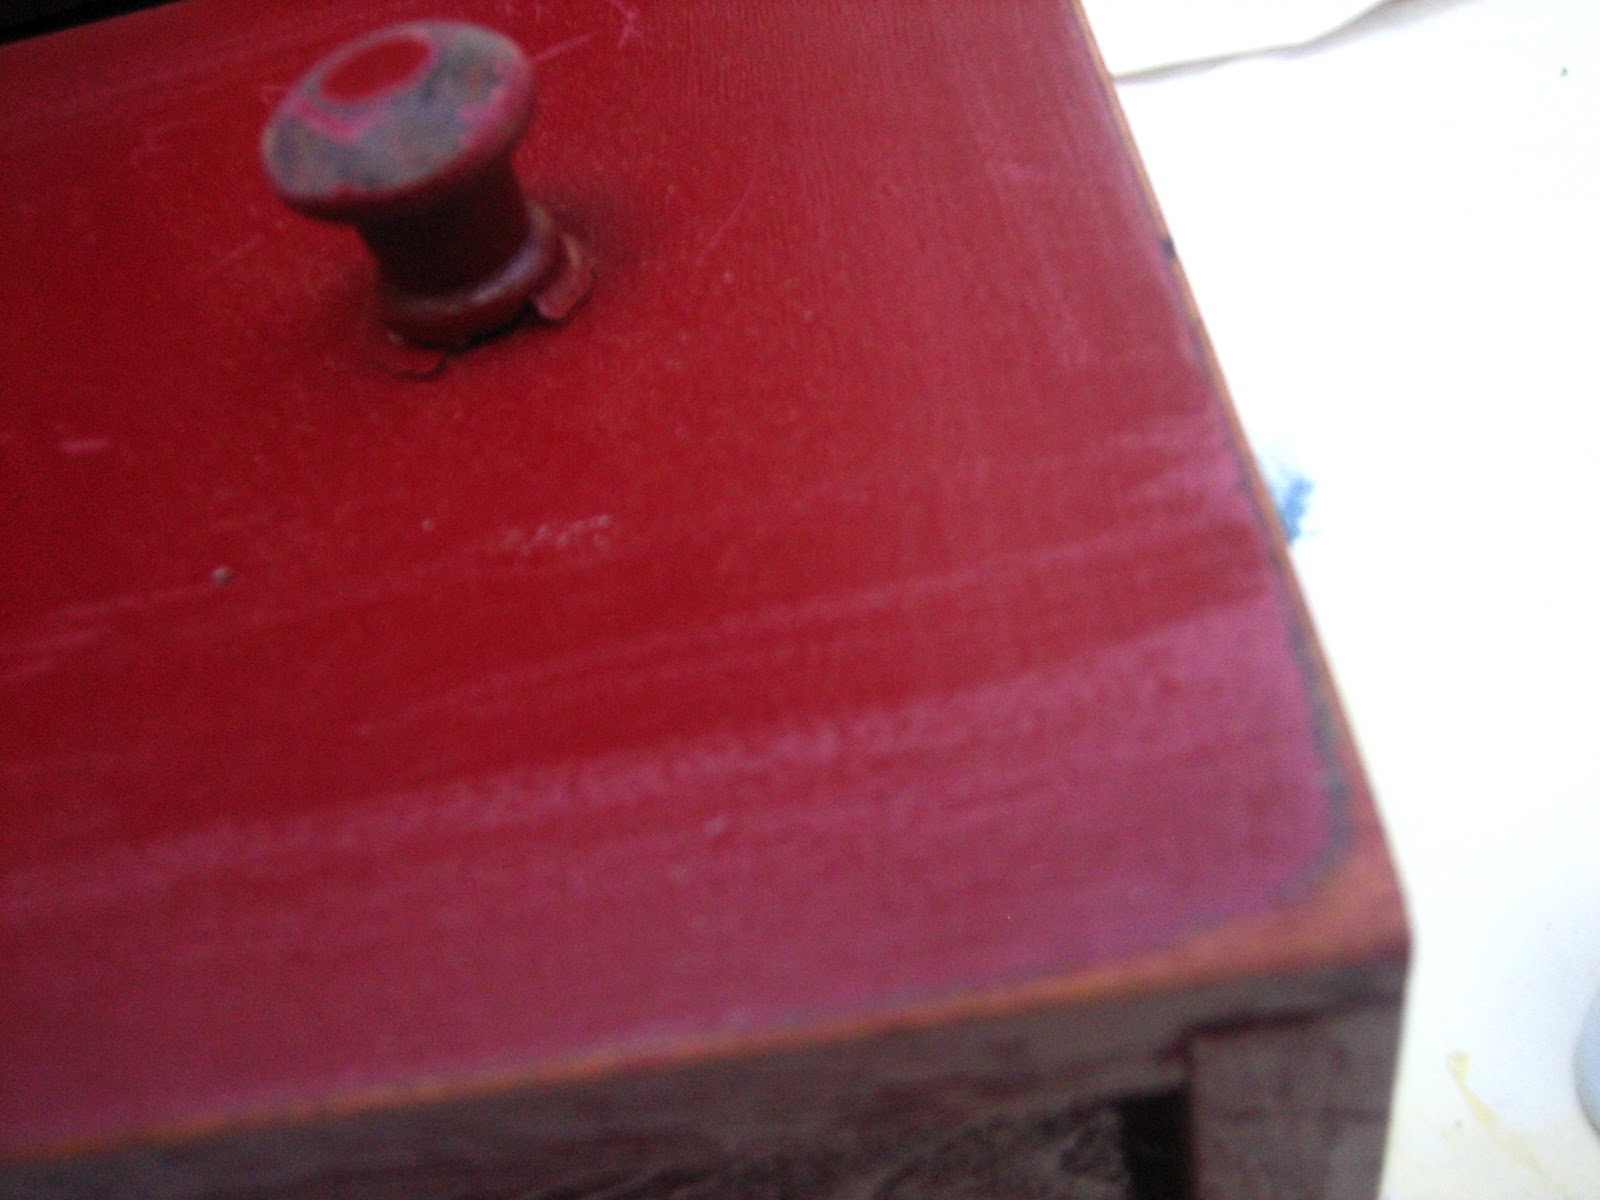
After 24 hours, I then sanded the edges and pulls of the project to expose the original finish/wood. When choosing where to sand, it's helpful to imagine what areas would naturally wear with time.
After 24 hours, I then sanded the edges and pulls of the project to expose the original finish/wood. When choosing where to sand, it's helpful to imagine what areas would naturally wear with time.
I mixed one part SW satin latex paint in Otter with 3 parts SW faux Impressions glaze. I used a foam brush to cover the piece (drawers separately), one small area at a time with the glaze and then wiped it off with a damp rag. The color will look pretty light going on but darkens up as it dries. You can apply several coats of glaze to get the shade you want.
I left it dry another 24 hours and then reassembled it and VOILA - Gorgeous! Now, I have a place to put all of my crochet accessories including projects!
 |
| AFTER |
 |
| BEFORE |
Can't wait to try it on the next piece - an old dresser we picked up in Canada a few years back.

I'm thinking a nice aqua blue or mustard? What do you think?
No comments:
Post a Comment